Showing posts with label Literacy Centers. Show all posts

All You Need to Know about Orton-Gillingham Phoneme Grapheme Cards

Things you need to know about your Orton-Gillingham Phoneme Grapheme Cards. Learn why keeping your cards in a Blending Binder will make your three part drill a breeze to differentiate for your small reading groups
things you need to know about orton gillingham phoneme grapheme cards
The three part routine is my favorite part of the phonics block. I love how flexible it is. It can take five minutes...or if we are coming back from a long weekend, and my students need some solid review, we can practice longer. I can even do parts of the routine in line. I have complete control of the phonemes/graphemes that my students are practicing. That darn 'qu' is just not automatic yet for some of my first grade readers, and so it remains in our three part routine, including our blending binder.

What is a Blending Binder?

Very simply, it is a three ring binder filled with index card sized consonant and vowel graphemes. The binder helps to keep the cards organized and easy to use for the last drill of the three part phonics routine. 

How do I Set it Up?

I think the easiest way to set up our binder is to start with two sets of phoneme/grapheme cards. The first pack is a set of flash cards to use with steps 1 (visual) and 2 (auditory/tactile) of the phonics routine. This set can be shuffled as needed, and cards can easily be taken out of the deck once they are mastered. You can read more about parts 1 and 2 HERE.
The second pack of cards, is to arrange in the three ring binder for blending practice. Having a second set exclusively for the binder will keep the cards organized based on initial, medial and final sounds, and ensure we are set to blend without needing to reorganize cards. 

What cards go in the initial, medial and final sound spots?

I get this questions a lot from teachers who have already started setting up their binder. The cards that are the "hardest" to place are the A-Z consonant cards. Most of the other cards have a distinct place in the binder.

Initial Sounds

Any letter that will create a vowel sound (like y, r, w) MUST go in the initial position. We also want to be conscious that some consonants can change the sound of our vowels (m and n). It does not mean these consonants have to go in the initial position, but only move them to a final position (or include a second copy) when your students are ready. Also having initial sounds that can be elongated into the vowel can help when it comes to blending "S-A-T >> SSSAAA-T >> SAT"
So here is MY list. This does not have to be your list, it is good to experiment.
c, l, h, j, k, ch, r, f, s, th, w, y, v, z, qu, followed by the initial consonant blends. We know the blends are initial sounds because the consonants are followed by a dash. I also know these consonants are out of order (I follow the sequence from Recipe for Reading)

Medial Sounds

This is where all of the vowel sounds go. I have chosen to print my vowels on yellow, but some people choose pink or blue. Really, you can pick any color you like, but having your vowel sounds on a special color help our students start to identify those sounds as a unit, and begin noticing patterns within words.
Some vowel sounds do not go IN the binder. They are meant solely for parts 1 and 2 of the drill. An example of this are the silent e cards. a-e should not go in the binder because it will not help our students to read silent e words (however it does have a great place in parts 1 and 2, because our students should choral response with "a silent e, says a").

Final Sounds

Much like the initial sounds, there is not a hard rule about what consonants go in the final location. I try to save some of the consonants that are used frequently in word families.
Here is MY final sounds list.
d, g, m, t, p, b, n, sh, x, th, followed by the double consonants, and final blends. We know the blends are final sounds because the consonants are preceded by a dash

How do I Use My New Blending Binder?

In the binder, real and nonsense words can be created. Eventually, I start to have my students look at these nonsense words as potential syllables in bigger words - with this, they are able to read open, closed, silent e, vowel team, diphthong, r-controlled and c+le words/syllables.

Then we follow the "I do, We do, You do" gradual release model of practice. I model how I tap each grapheme, while verbally producing the sound. Then, using the same word, we do it together, and finally the students on their own. Then I change ONE grapheme. At this time, I check to make sure the word follows correct phonics rules - for example I would not want to have the word KAT, because initial /k/ when with vowel a should be a C).

Do I Need More Than One Binder?

Having more than one binder is definitely helpful. I have a binder for each of my primary groups. This is so I can add appropriate graphemes as my students are introduced to them. Because my groups are all at different levels, each binder has different cards. 

Full disclosure: Because I will never lie to you! 
The phoneme/grapheme cards I have available in my TpT shop, do not create a low prep binder. Even with the various print options (direct to index cards or cut apart), it takes some time to prep. When I first started using a blending binder, I only had one. Then each year, I created another one, and each year, executing my phonics instruction has gotten easier. Every minute of prep work has been worth it (which is why I have created five for myself, and even more for colleagues) because the impact it has had on our students is monumental. 

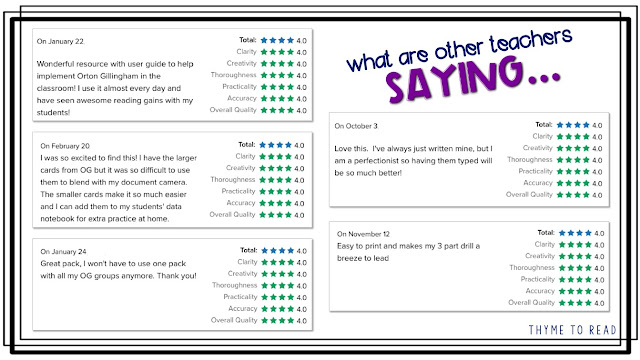
What Are Other Teachers Saying?

You do not need to take my word for it, other teachers are raving about the blending binders they have created to support their phonics block instruction. Overall, teachers feel that creating this binder has had a positive impact on instruction, improved student learning, and ultimately has saved time. what other teachers are saying about their Orton Gillingham Blending Binder to use during your phonics block
SAVE FOR LATER:
why you should keep your phoneme grapheme cards in a binder

Since using this tool with my students, they have become more successful and automatic with identifying vowel patterns in words. I hope sharing this tool will boost your students skills as well, and help to save you some time when planning your phonics instruction. 

You can also check out these related phonics post:


Easily Improve Phonics Instruction with Concrete Objects

Teaching phonics with concrete objects can help spelling patterns to stick. Multi-sensory phonics instruction for first and second grade.

One of my favorite memories from Kindergarten was creating a Letter Museum. My teacher asked my classmates and I to bring in objects, pictures or drawings of things that started with the letter we were learning that week. We were all so proud of our museum, because it was something we had a hand in creating, and it had personal meaning to each one of us. 
Do you know why a primary alphabet has pictures above each letter? The reason is simple, it is building a relationship between letter name (and how it looks) and sound. If a student were to get stuck when retrieving a letter sound, the picture cue could help stimulate a connection. 
easily improve phonics instruction with concrete objects
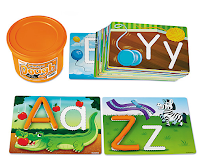
Dough Mats from Lakeshore Learning.
My Kinders love these!

What happens though, when our students move beyond the 26 letters of the alphabet? What can we do to help build those connections? Using concrete objects to introduce new spelling patterns can create a deeper association and lasting memory of these new skills. We can use my Kindergarten teacher's idea for the "Letter Museum", and keep it relevant for our first and second graders.

You could certainly, still ask your students to bring in objects that match the phonics pattern/spelling skill you're teaching, however, that could get difficult because of the many ways to spell the same sound (LONG A: a, a_e, ai, ay, eigh). 

Instead, we can control the experience a little more by providing our students with unique opportunities to make memories with the new skill. 
teaching spelling patterns that stick using concrete objects
When teaching my students about the final -ck sound, I like to use the visual of a BACKPACK. All of my students know what a backpack is, AND, perfectly, a backpack goes on their back - just like the final -ck sound goes on the "back" of a word/syllable.

They create their backpack from a file folder and "stuff" it full of pictures and words that follow the final -ck pattern. This activity, while it takes some time, not only helps my students with a visual, but it also solidifies when they should use the final -ck pattern.

When I only have my students in front of me for 20-30 mins each day, I have to make the most out of the time I have with them. A multi-sensory project like this may look like just another craftivity, but I make sure to include word sorts, picture matching and encoding practice. This activity when paired with decodable readers, could last most of the week in my small groups. 
Even though it can be fun, it doesn't always have to be a project, or a grand production. When teaching R-Controlled vowels: 
  • We pull out the pirate patches for AR
  • We snack on popcorn for OR
  • We draw a simple picture of angry dogs for ER, IR, UR
When possible, I also try to find a read aloud to help introduce new skills to my students. THIS post shares a great book to read for R-Controlled Vowels.
These ideas while simple, can have just as great an impact on our students. The only goal we have is to help solidify a memory, and make retrieval of these sounds/spelling patterns automatic. All of this can be done with the experiences we create during our phonics block.

PIN FOR LATER: 

Let's start a list! Share in the comments some ideas you have for concrete objects. Make sure you list the phonics skill/spelling pattern it applies to.

And before you go, check out these related posts: 


10 Things You Need to Run Fabulous Reading Groups

10 things you need for your reading group. Ideas include small group organization, teaching tools, literacy manipulative and more
Reading Groups! My whole day is made up of reading groups. I teach K-5 reading intervention, so my entire day, week and year is made up of small literacy groups. I love teaching reading, so for me, it is a good thing. However, I know setting up, managing and planning for guided reading groups can be overwhelming. My friend Jean, from Reading in Room 11, shared Ten Things that will Revolutionize Your Reading Groups, and I am here today to share 10 more things that will help you on your way to having fabulous reading groups. 

Color-Coded Group Materials
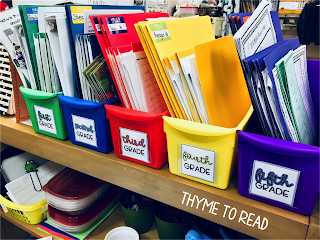
For me, this is the crux of my small group organization. I see at least 8 small groups per day, and having student supplies color coded is a must. My school uses the Fountas and Pinnell Level Literacy Intervention (LLI) system, and each kit (grade level) is color coded. So, my supplies for each grade level group matches the color of the grade level kit. This helps me as I am picking out books for each group, so I do not have to think too hard about what color LLI boxes I need to pull from. In each bin, I keep the books, and activities I need for that week. I also keep the students' color coded folders. These folders hold student progress monitoring assessments, sight word books, student reference charts (Fundations alphabet chart, RACE response and close reading mini anchor charts) and anything else my students may need to reference on a regular basis.
I took my color coding a step farther this year, by color coding our benchmark assessment materials. We copied student booklets and teacher recording sheets to follow the color coded system. This way, as we look back into student folders, we can clearly see what work has been saved from each grade. It may be a little too Type A for some, but I think anything you can do to make your job a little easier is worth doing.
You can read more about these book bins HERE


Magnetic BINGO chips and wand
I use these materials every day, and I have found so many uses for them. I initially purchased them for practice isolating and segmenting sounds in words, and blending sounds together. For example, I may provide a word like 'brush' and ask my students to identify where they hear the 'sh' sound. They would then use one of their Magnetic BINGO chips to indicate initial, medial or final sound placement on Elkonin boxes. I may also provide the students with a picture of a word like 'crib' and they would push the chips into Elkonin boxes to represent the initial, medial and final sounds, before using the Magnetic BINGO wand to swipe all the chips and blend the word together.
But like I said, I use these tools all the time. I have used them to count syllables, represent points awarded in a game and to play actual BINGO. I have also recently started using them as a behavior management tool for one of my students. He has the "blurts" and I now give him three blurt chips (we started at 5), and when he blurts, I take a chip. When he has exhausted all of his chips, he misses out on earning a point on his classroom daily sheet.

Phoneme-Grapheme Flashcards and Blending Binder
Incorporating spiral review into lessons was not a strength of mine. That is...until I introduced Orton-Gillingham strategies into my small groups. A big part of Orton-Gillingham is building upon the skills the students have already learned to help them be successful with the new skills. The Phoneme-Grapheme flashcards and Blending Binder make this "building block" like instruction not only possible, but very easy. These cards help you execute visual, tactile and blending drills into your daily whole group, or small group lessons. By showing the students a card, they can orally produce the sound the letter(s) make, or you can produce a sound and have the student produce the letter(s) in tubs of rice or sand. Additionally, for blending practice you can put these cards in a three ring binder (initial sounds in the first ring, vowel sounds in the middle ring, and final sounds in the third ring) and have the students practice applying their skills to blending words and syllables.

Coffee stirrers
Yes, I said coffee stirrers! Such a simple item has become one of the top 10 things I use during my reading groups. I was teaching my student how to decode a word using syllables, and my students were understandably using a bit of trial and error to figure out where to divide their word. I was trying to have them use their finger to to cover part of the word, but that wasn't working because they still needed to see the rest of the word. I needed something skinny that would allow them to manipulate the parts of the word, and still see the part that was currently hiding under their finger. So, I quickly ran to the cafeteria and asked for some coffee stirrers. Now my students can try different syllable patterns, and practice decoding easily.

The Reading Strategies Book by Jennifer Serravallo
This book should be gifted to teachers the way The First Days of School (Harry Wong) currently is! The Reading Strategies Book, is a must for all elementary teachers. This professional development text helps support step-by step strategies for skilled reading. It is not only the what to teach, but the HOW TO teach it. The book is organized into chapters focusing on engagement, early reading, comprehension (fiction and non-fiction) fluency, vocabulary and writing in response to reading. The strategies are research based and reading levels suggesting the appropriateness of the strategies are listed. Serravallo provides a guide for prompting students to use the strategies, as well as a visual that could easily be recreated. I have re-created many of her visual prompts into mini anchor charts. I use the large index cards, and introduce the visual image to help my students to understand the strategy a little more. They are great to pull out for a non-verbal reminder to prompt my students to use the strategy.

Phonics Notebooks
I was looking for a hands-on way to practice phonics skills, that would compliment my Orton-Gillingham routines. I really liked the idea of an interactive notebook, but with only seeing my groups for 30 minutes each day, I knew I could not commit time to the cutting and assembly required for many of the interactive notebooks. So I made my own. These phonics notebooks provide picture cues to help students recall the sound each focus skill makes, encoding (spelling) practice, multisyllabic word decoding practice, picture sort, sentence writing and word building using a spinner game. I started using these this year in my classroom, and my students are loving them because they are predicable (each skill has the same/similar components) and they feel successful. My colleagues are loving them because there are opportunities to practice reading phonetically regular words, encoding, decoding, phonemic awareness, and writing.


Sticky Notes
I feel like sticky notes are a must for every aspect of the day. There are just so many uses. I use sticky notes to write observations regarding my students' progress, or general notes about a teaching point I want to make at a late date. I add these notes into my planbook, or the communication log I share with classroom teachers and other providers. I write on the fly questions, like "Has ______ had an OT eval? Noticing _______" and later follow up with an email to the OT and school psychologist. I also write little "love notes" to my students praising them for something great they did or as a little take away about a strategy they should keep using in the classroom.

Technology/Apps
Two of my favorite apps to use in my small reading groups are Class Dojo and Epic! Books for Kids.
Class Dojo has been a great way to promote positive reading behaviors like persistence and stamina, as well as communicate easily with families. The format of Class Dojo is really inviting, as it mimics familiar social media, and I have found that my parents are more likely to communicate through the app, than by email. My students also like receiving an occasional surprise reading challenge, that (if they choose to accept) helps them to earn a reward.
Epic! Books for Kids is a great app that can provide unlimited access to books for your readers. My students have been greatly motivated for the opportunity to read on the iPads. They enjoy the different format, and Epic! has audiobooks they really enjoy. These audiobooks are great for assessment days because it allows me to create a listening center, which needs almost no teacher support. I have also used these digital books for a guided reading lesson. Many of our students will develop into digital readers, and I thought it was a good idea to start engaging them with digital reading opportunities.
There are many other ways to incorporate technology into your small group lessons, these two apps are just the ones that have had the greatest impact.

Plastic Canvas
This is another tool I didn't know I needed, until I discovered the great effect it had for my students. You can add this plastic canvas to the introduction of sight words, and integrate a multi-sensory approach. For your tactile learners, this method could have an impact on the way they acquire their sight words. You can read more about using this tactile approach in my blog series about sight words. The best part of using this "bumpy board" as my students call it, is that your students will leave your small group with a crayon rubbing of their new sight word that they can use for later practice and review.

Games
Encouraging your students to learn through play is one of the easiest and fun ways for them to meet your learning outcomes. I try to use games as often as possible in my small groups. Jenn has a great game called Students vs Teacher that I use all the time to warm up my students and review skills previously taught.
A big thing that I have learned about games, is to be consistent. Learning a new game takes time. Time that your students are not practicing content. So really, that means less time is being spent on meeting your objectives. To keep consistency, most often, my students play one of four games. These four games keep the novelty fresh, but also allow us to jump right into the game and have more practice. You can grab these games for FREE, and start using them right away with your students.

I hope the tips and tools I have shared will be helpful or inspiring for you. Reading groups can be difficult to establish, manage and plan for, but after some adjusting to figure out what works for you, they can become really fun to teach. If you have other things that are MUST HAVES for your small reading groups, please share them with me. I'm always looking for new and exciting things to share with my students. 

Don't forget to check out other great posts sharing more tips to improve your literacy instruction, from The Reading Crew


Check out these related posts: 

How You Can Motivate 21st Century Readers with Technology

Find out how using technology in the classroom to can help promote 21st Century Skills with your readers.

"You are not old until you feel old," is something I would say to my grandparents when I was a little girl. And gosh darn it, I certainly do not feel old, until my students start showing me up with their awareness and fluency of technology! The world our students are growing up in, is NOT the world we grew up in, no matter how old you are. But, it's our responsibility to equip our students with the skills that will be crucial to their success later in life. No pressure! 😅😉
Before I share my four tips with you, I think it is important to share a little about "What are 21st Century Skills?" I feel like the phrase '21st Century Skills' is thrown around a lot, and has gotten a 'bad rep' as just a buzz word. But, I took some time in my third year of teaching (once I finally felt like I could get my head above water) to really try to better understand what everyone was talking about when they said "21st Century Skills". The website linked above was a big help, and I encourage you to check it out. In quick summary, they are the skills that will allow our students to be technologically savvy, strong communicators and superior critical thinkers.

Flip the format

Like I said, our students are growing up (and will work) in a different world than ours. They have a wealth of technology literally at their finger tips, and therefore unmatched access to information. We can help support them by introducing a variety of text formats. Playaways, Podcasts, eBooks, and even self-created audiobooks can help our students become more aware of the ever growing and changing technological world of theirs. 

Sharing our love of literacy is an imperative first step, but we have to continue exposing our students to the different technology tools that can also support them in their reading journey. Playaways, audiobooks, and text to speech tools, can help bring equity to our classrooms by allowing struggling readers to access information that would have caused them much frustration. Podcasts are a great way to expose our students to different viewpoints, and can help to develop students' critical thinking. One of my favorite lessons ever, was when I pushed into a fourth grade classroom. The students were listening to a podcast about a colonial trade (presented by tradesmen of Colonial Williamsburg), and taking notes for research. My struggling readers were never so engaged and actively participating, because all of a sudden, they were on an equal playing field.

Promote Creativity and Innovation

Following my students' extensive research of their colonial trade, it was time for them to 'show what they know'. They were given the chance to create a cartoon, with self-recorded voice overs. They included facts about their trade, and shared opinions about why their trade was important to colonial villages.

Here is a list of websites and apps that your students could use to make videos to 'show what they know'. My students used Toontastic, which is sadly no longer available. However, Animoto is another student friendly site that I have used in the past, which can accomplish the same outcome of creating animation.

You can further promote creativity and innovation by:

      Find out how using technology in the classroom to can help promote 21st Century Skills with your readers.
    1. giving up control to the students. By allowing students to spread their wings and take charge in their learning they will learn to develop their curiosity. 
    2. encouraging discussions. Students can learn best from each other, and the conversations will help them to begin developing the life long skills needed to work on a professional team. You can support your students in this process by providing sentence frames for accountable talk.
    3. providing time for reflection. When students are given time to critically reflect on the work they have done, they are able to consider things they would have done differently and open up the doors to more growth. 
    4. celebrating wins. Students deserve to know their work and effort is appreciated and recognized. Taking time to celebrate wins, even the small ones, will give your students the motivation and encouragement to keep taking creative risks. 

Collaboration is Key

A little side note: my husband works at a high level technological research university, and he often comments that his students struggle to work in teams. It has been his job, to teach leadership courses that would help these future engineers to develop stronger collaborative skills, and support them in working with a team. 

So, how can we help our students develop the skills they will need later in life? Teach them how to work collaboratively with their peers! We can incorporate daily opportunities for our students to work together. Even our youngest kiddos, can start by working together to complete a puzzle. We can progress them further by asking them to put the letters of the alphabet in order. We can ask our 2nd graders to become 'experts' on a topic, and then work with a partner to share facts that can later be used to complete an activity.  Our 4th/5th graders could complete a similar activity but on a grander scale with the whole class (World Cafe protocol). By requiring our students to rely on another, they can rise to the occasion to be a teacher, and a listener.
You can check out more collaborative protocols to use in your classroom here.

Taste of the "Real World"

I may be in the minority as I confess, I still hand write my shopping lists each week. There is just something about having a growing list on the fridge that everyone can add to (or forget to add to) each week as we run out of things. It's my system, and I like it. However, other than maybe a thank you note, when was the last time you hand wrote something of substantial meaning?

So, let's give our students more of what they will experience in the "real world" - TECHNOLOGY to help them complete a task. Most of our students are pretty savvy with playing games, drawing pictures, even my three year old can capture a pretty good picture. But these activities are not helping them to communicate with others to share their message or point of view.

You can incorporate technology and encourage teamwork with the use of a collaborative "whiteboard" like Padlet or Boardthing. With my littles, I have them work together to see how many phonics based words they can find during their independent reading. For my upper grade students, I propose a question, they can respond on the whiteboard, and their peers can read their response, before leaving feedback.

Is it just me, or does the world not function without Google Apps? I remember when my school finally converted to Google Accounts, I thought the skies opened up and rained Skittles (like only red ones too)! We can begin introducing our students to GAFE (Google Apps for Education) right away. My littles use Google Apps to complete word work activities (GOODBYE LETTER MAGNETS), my older students and I collaborate on their writing, and all of my students use graphic organizers on their devices to illustrate what they learned from a text.
Find out how using technology in the classroom to can help promote 21st Century Skills with your readers.
By introducing these different forms of technology, we can make great steps to expose our students to the types of experiences they will have in the future. 

SAVE THIS POST FOR LATER:
Find out how using technology in the classroom to can help promote 21st Century Skills with your readers.

I am by no means a 21st Century classroom expert, but I am trying and learning as I go. Each year, I challenge myself to get better at promoting innovation, creativity and collaboration with my students. Please feel free to share ways you have encouraged 21st Century skills in your classroom. I would love you to share your successes with us, so we can all be motivated to try something new or different this year!


Powered by Blogger.
Back to Top